
Changing the Graphics on Your Advance or Imagine Banner Stand
Are you considering changing the graphics on your Advance or Imagine banner stand yourself rather than ship it back to us in Toronto for the change out, we'll take you through this process step by step. You can watch a video of the process by clicking the video at the top of this post or follow through each step below. You'll need the following items to complete this task:
Changing the Graphics on Your Advance or Imagine Banner Stand
- Two 2.5mm Allen Keys
- Masking Tape
- A Large Table to Work on
- Your new banner from KCBGraphics.com
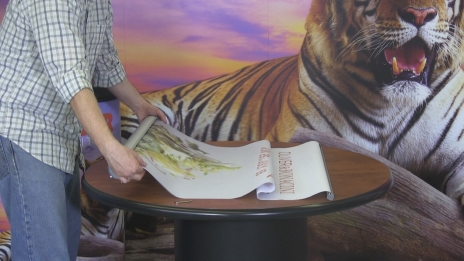
Okay now we're ready to proceed, let's remove the cassette from the banner stand base.
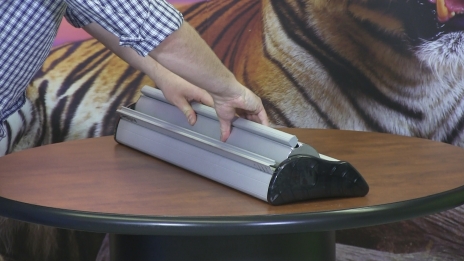
Set the base aside. Grab one of the Allen keys and place it beside the end with the small hole (as shown below). Carefully pull the banner out of the cassette using one hand while holding the banner with the other so it doesn't pull back into the cassette.
Continue until the white leader strip appears and you reach the end (it won't come out any further).
While holding the banner with one hand, grab the allen key and attempt to insert it into the small hole in the end of the banner stand cassette.
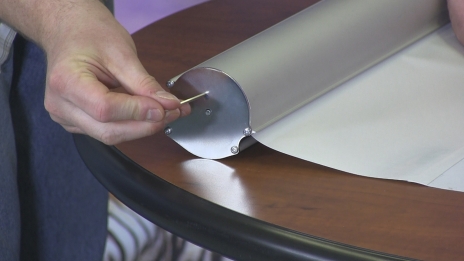
Initially it won't go in, slowly let the banner retract back into the base, 1/8" at a time until the hole opens and the allen key slides in fully as shown.
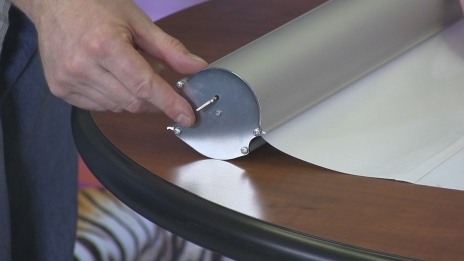
With the allen key fully inserted the banner it's safe to let go of the banner, it will not retract into the base. Place the upper rail on the table with the back facing up. With the second allen key loosen each screw on the upper rail.
With all of the screws on the upper rail loose pull gently on the banner to remove it from the upper rail. There should be an aluminum bar attached to the banner as well.
Peel the banner off the upper rail, being careful not to bend the aluminum rail, and set the rail aside.
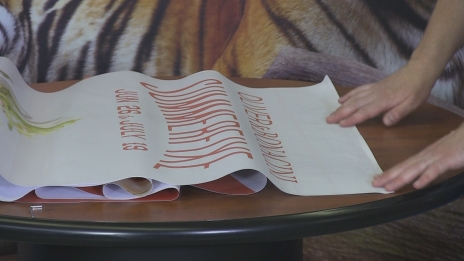
Roll up the banner.
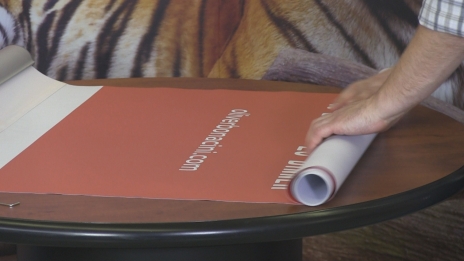
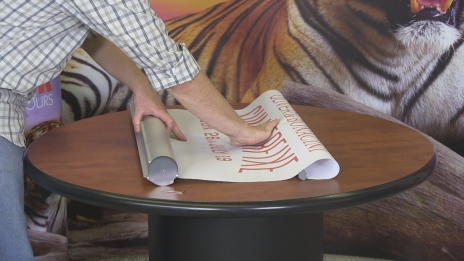
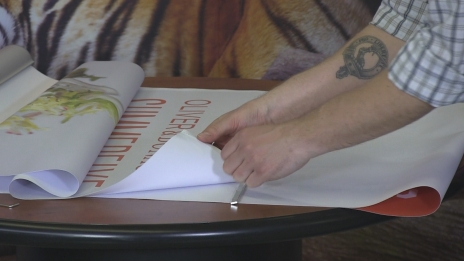
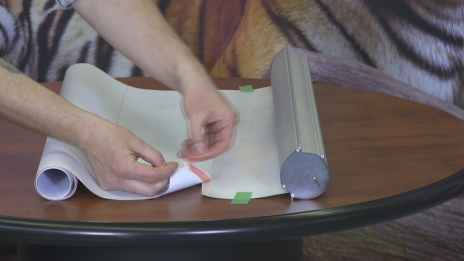
Flip the banner over to the other side of the cassette and peel it off the leader strip.
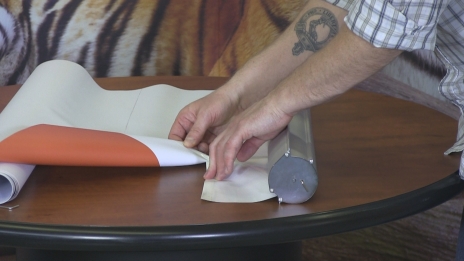
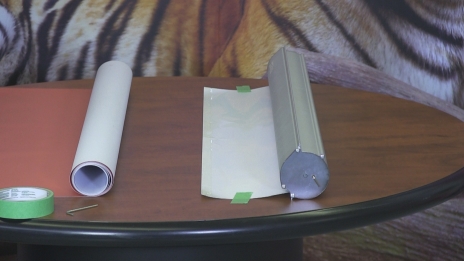
Tape down the white leader strip on each side.
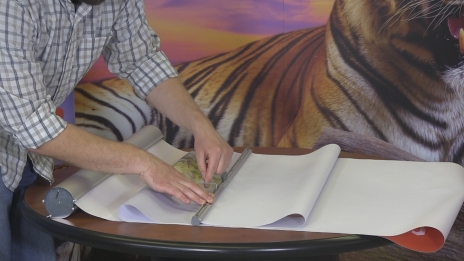
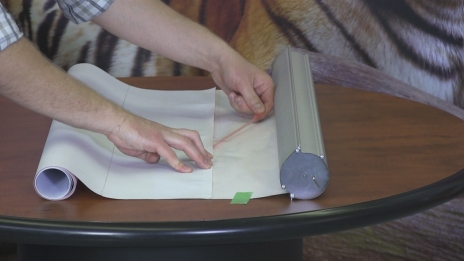
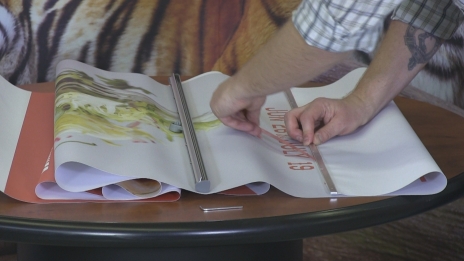
Place your new banner face down on the table and carefully align the bottom edge of the banner with the line of adhesive tape on the white leader strip. Ensure that your banner is running square and perpendicular with the leader strip.
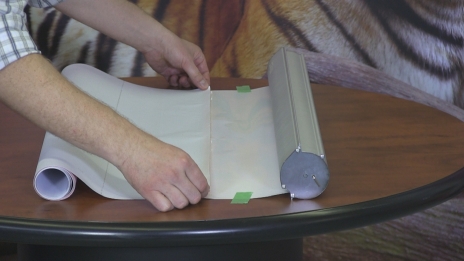

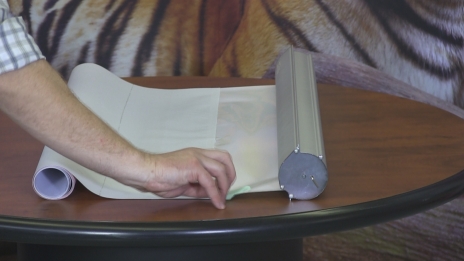
After aligning the banner, roll back one edge and peel off the first 4 inches of the red plastic layer from the double side tape and press the banner down firmly, adhering it to the leader strip.
Now slowly move across, peeling the red plastic layer and adhering the banner straight and square to the leader strip.
Remove the tape from the leader strip.
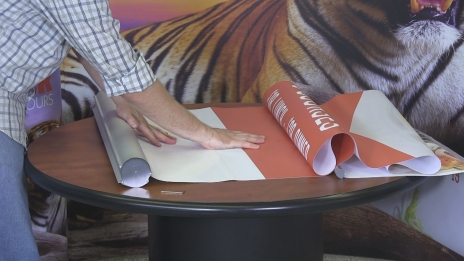
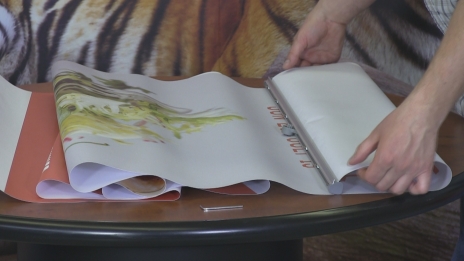
Flip the banner over the cassette so it's face up.
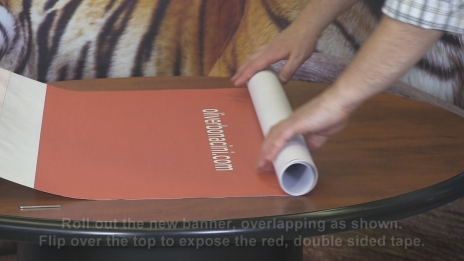
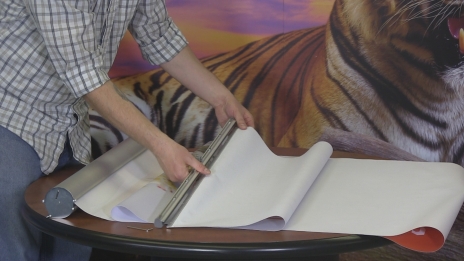
Roll out the new banner, overlapping as shown.
Flip over the top to expose the red, double sided tape.

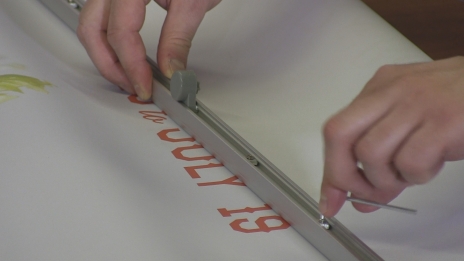
Using the aluminum bar that was removed earlier, align it with the top of the banner and remove 4 inches of the red plastic from the double sided tape and stick down the bar, carefully aligning it with the top of the banner as you move across.
Once you've got the aluminum bar attached to the new banner, grab the upper rail and seat the banner and rail back into the channel in the rail as shown.
With the banner firmly seated into the rail tighten each screw with the second allen key, DO NOT over tighten these screws.
While firmly holding the banner remove the allen key from the end. DO NOT let go of the banner!

While firmly holding the banner, slowly let it retract into the base. Use your hands to guide the banner to ensure it's going in straight. DO NOT let go of the banner or it will slam into the cassette!
That's it you're done changing the graphics on your advance or imagine banner stand. You can now place the cassette back into the retractable banner stand base!
If you're having difficulty with any of the steps shown don't hesitate to call us with any questions.
Related Products


