
A spot UV coating is a high gloss finish that is applied to certain graphic elements of a printed, marketing piece. If you're considering printing spot UV business cards or other marketing pieces with a spot coating, you'll need to set up your print ready files a specific way so they're acceptable to your printer. In this video we'll take you through the set up process so you'll be able to supply those files. We recently completed a Spot UV project for Newcomp Analytics; we'll use their catalogue design created in Adobe InDesign to illustrate our methods.
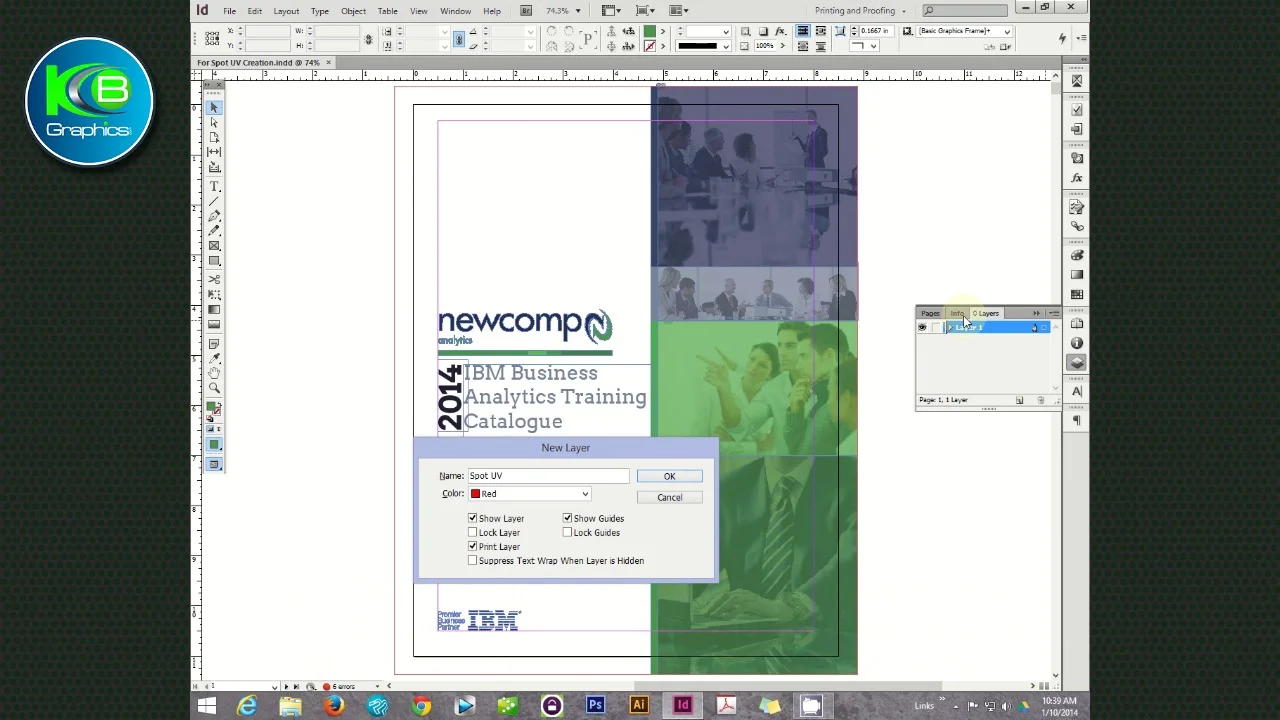
Our first step will be to create a new layer for the spot UV elements. Let's click the layers icon and click New Layer and name the layer Spot UV.
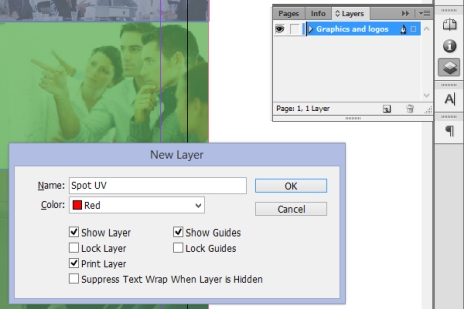
Create a new layer in Adobe InDesign.
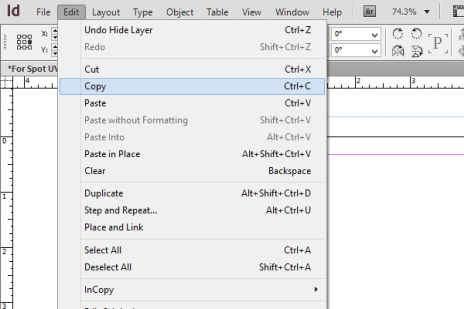
Now we'll need to decide which elements will receive the Spot UV coating; you can apply Spot UV to logos, images, text or even an area that has none of the above. In our case we'll be choosing a logo, web address and images. Let's hold down our Shift key and single click the items we want spot UV to be applied to and then click Edit and Copy.
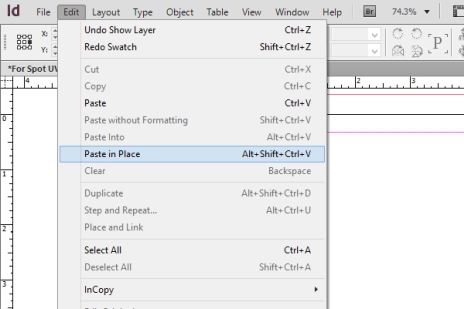
On the layers menu click the Spot UV layer, then click the Edit drop down menu and select Paste in Place to paste the elements onto the Spot UV layer.
Using Paste in Place ensures the chosen items will be in the exact position as the original which is very important when adding a Spot UV coating. We've now pasted the elements onto the Spot UV layer, let's turn off the other layers to confirm we've got all of the elements we want Spot UV applied to.
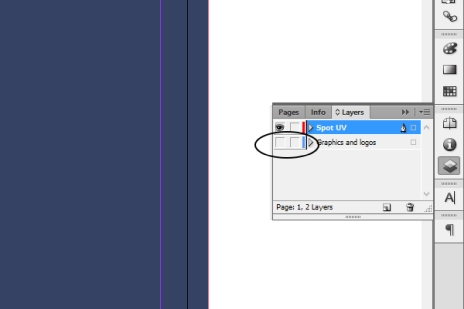
Now we'll need to switch all of the chosen items to 100% black, this ensures your printer we'll be able to produce a plate for only the spot UV items. Lets press Ctrl+A (Edit>Select All) to select all of the items on the Spot UV layer, then click the Swatches icon and click Black.


We now have all of our Spot UV elements set up to output to the black/Spot UV plate.
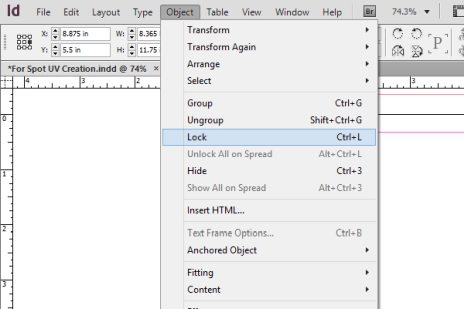
If you've got all the correct items on your spot UV layer choose the Object drop down and select Lock, this locks these items in position ensuring they can't accidentally be moved out of position which would cause the spot UV to be printed in the wrong location.
We're now ready to produce a press quality PDF for the Spot UV. With only the Spot UV layer turned on lets click File > Export to create your Spot UV PDF.
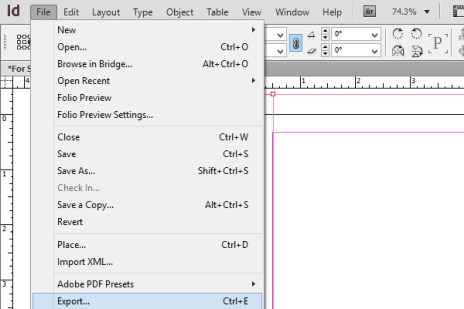
This PDF should be ouput as Press Quality with crops marks, .375" bleeds and have SpotUV in the filename.
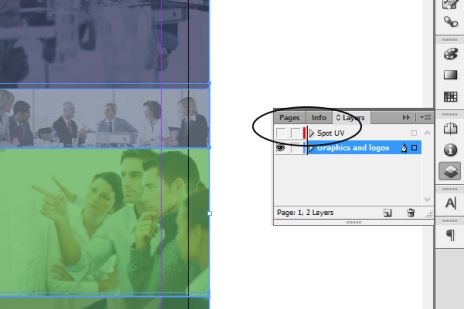
Lets produce a press quality PDF for the CMYK print job. With the Spot UV layer turned off and your other layers turned on lets click File > Export to create your PDF. This PDF should be ouput as Press Quality with crops marks and a .375" .
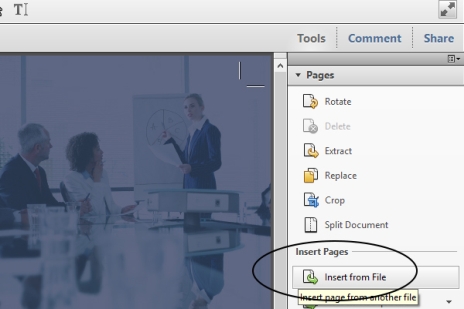
To test the position of your Spot UV file you can open your CMYK PDF in Adobe Acrobat and insert the Spot UV PDF as a page, if you toggle between the pages you should see no movement in the position of the matching elements.
Alternatively you can also toggle the Spot UV layer on and off and achieve a similar result.
You now have press quality PDFs of the CMYK print job and Spot UV that can be sent to your printer for successful completion. If you have any questions on this please don't hesitate to call 1.800.350.7152 for assistance.
Related Products


Leave a Comment